


Everyone is always going on about "test driven development" and unit tests and whatnot.
So here is a practical guide on how to set up CodeClimate with your Ruby on Rails application so you can keep track of maintainability and test coverage. (Plus you get to show some fancy badges in your readme)
The first thing you need are unit tests. With Rails these are very straightforward. Simply go into your test/ directory and start writing.
I won't be going into detail on how to write unit tests and what kind of things need unit tests, but I will assume you have at least a couple tests (even if they are just dummy tests, like the ones I'll be using)
The full project is available at github.com/TrailBuddies/api if you are interested.
Coverage reports??
A coverage report is a file showing the success/failure of your unit tests. They are often a JSON or HTML files and they can be generated through a variety of tools.
We will be using SimpleCov because it integrates seamlessly with CodeClimate.
So let's get started!
SimpleCov
First thing first, add the simplecov and simplecov_json_formatter gems to your Gemfile.
group :test do
  gem 'simplecov', '~> 0.21.2', require: false
  gem 'simplecov_json_formatter', '~> 0.1.2', require: false
end
Update the version numbers to your own needs
And don't forget to run bundle install!
Then, to initialise SimpleCov enter your test/test_helper.rb file and add this to the very top (before everything)
require 'simplecov'
require 'simplecov_json_formatter'
SimpleCov.formatter = SimpleCov::Formatter::JSONFormatter
SimpleCov.start 'rails'
With that, try running bin/rails test and you'll see a magical coverage directory in the root of your project. Inside it you'll find a couple different files. The important ones are coverage/coverage.json and coverage/index.html. We will only need coverage.json for our purposes, but take the time to check out index.html as well.
Eureka! We have coverage.json!
Now is the time to mix in a dash of CodeClimate to create the perfect blend.
I will be using GitHub Actions, but I'm sure any CI/CD service will work as well.
GitHub Actions
Create a .github/workflows/codeclimate.yml file and enter some boilerplate config:
name: CI

env:
  # Required app-wide environment variables
  API_DB_USER: test
  API_DB_PASSWORD: test

on:
  workflow_dispatch:
  push:

jobs:
  test:
    runs-on: ubuntu-latest
    steps:

      - uses: actions/checkout@master

      - uses: ruby/setup-ruby@v1
        with:
          bundler-cache: true
⚠️ I use the API_DB_USER and API_DB_PASSWORD environment variables in my project, but you may use different ones (check your `config/database.yml)
Database on Github Actions
Now we will need to set up a database for our test environment (you would have configured a test database in config/database.yml when you created your Rails app). Rails supports many different databases, but a popular on is PostgreSQL (and it's the one I use). I will show you the needed config to run a postgresql server on a GitHub Actions worker, but you may well need a different setup depending on your chosen database.
Begin by adding a service to your test job:
# etc...
test:
    runs-on: ubuntu-latest
    # important bit
    services:
      postgres:
        image: postgres:13
        env:
          POSTGRES_USER: ${{ env.API_DB_USER }}
          POSTGRES_DB: ${{ env.API_DB_USER }}
          POSTGRES_PASSWORD: ${{ env.API_DB_PASSWORD }}
        ports: ['5432:5432']
        options: --health-cmd pg_isready --health-interval 10s --health-timeout 5s --health-retries 5
# etc...
You will need to replace postgres:13 with your required postgresql version (e.g. postgres:11) and ports: ['5432:5432'] with the ports you need.
Actually testing
Finally we can create a test steps. You will need two steps at least to set this up properly: one to setup the database, and one to run the tests.
Setup (more, I know..)
Let's do the first step:
# etc...
steps:
      - uses: actions/checkout@master

      - uses: ruby/setup-ruby@v1
        with:
          bundler-cache: true
      # important bit
      - name: Setup Rails Database
         run: RAILS_ENV='test' bin/rails db:setup
# etc...
You should also run any additional setup in or after this step (but before the next step). For example, my project needs the bin/keygen script to be initialized before the app can run, so I simply modified the run key like this:
run: RAILS_ENV='test' bin/keygen && bin/rails db:setup
Testing (finally)
I will be using paambaati/codeclimate-action@v3.0.0, but there are probably other alternatives.
You will need to get your CodeClimate test reporter ID from your repository settings at codeclimate.com/dashboard.
Here are some images explaining how:

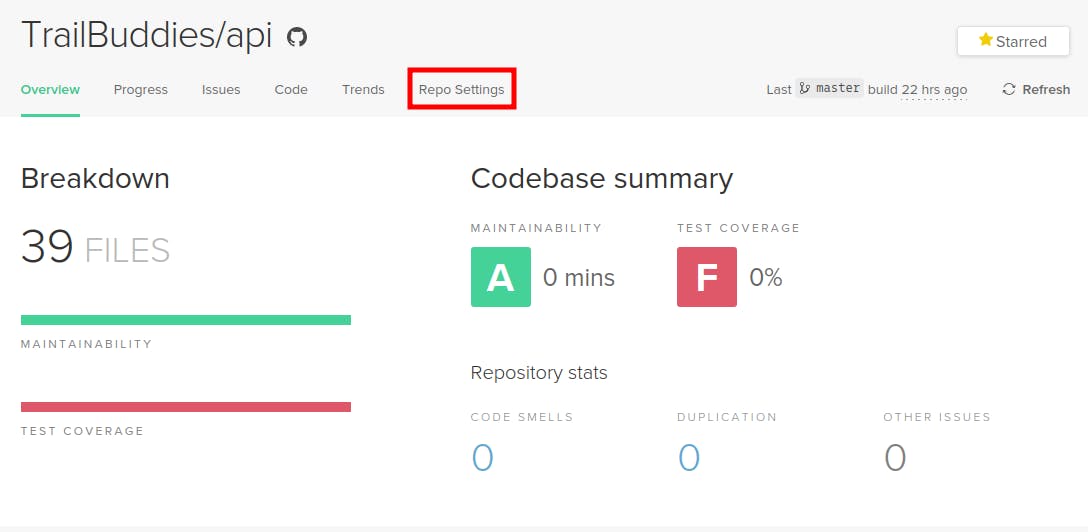
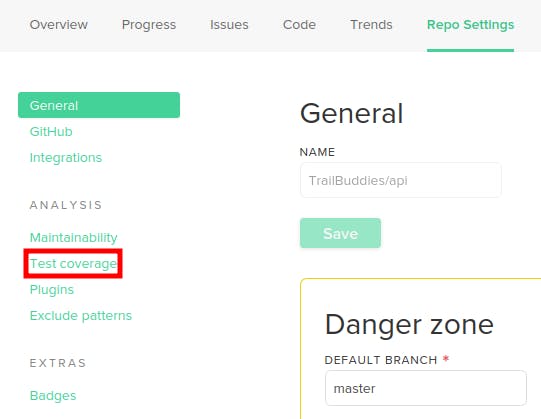

Create a repository secret (on GitHub) called CC_TEST_REPORTER_ID containing your reporter ID (from above).
Then we can create the actual testing step in our workflow file:
# etc...
      - name: Test & publish code coverage
        uses: paambaati/codeclimate-action@v3.0.0
        env:
          CC_TEST_REPORTER_ID: ${{ secrets.CC_TEST_REPORTER_ID }}
        with:
          coverageCommand: bin/rails test
          coverageLocations: ${{ github.workspace }}/coverage/coverage.json:simplecov
          debug: true
See github.com/paambaati/codeclimate-action/tre.. for more info on how to use this action.
Enjoy
Finally, you can push all your changes and watch as your CodeClimate repo updates.
The entire project is available here if you are interested:
If I missed anything please let me know in the comments!